

Replacing Spalled Bricks on a Chimney
Chimney bricks experience the wrath of all seasons, so replacing spalled bricks on a chimney is a worthy skill to have.
By Brian Estill
Bricks are like sponges. We all know that. So why do we think it’s not important to waterproof bricks with a sealant? Equally troublesome is the belief that masonry is maintenance free – it’s not. Replacing spalled bricks on a chimney is a part of maintenance. Bricks on a chimney take on the worst of all four seasons, so sealing your chimney should to take priority over the rest of your house.
With that being said, if a chimney has more than two or three spalled bricks, this problem needs to be addressed immediately. Let’s say you see a few courses of brick that are spalled. This is a sign that the chimey cap has gone bad and needs to be replaced.
Tools and Materials
- Bricks (of course)
- Mortar (of course)
- Hammer drill
- 5/8 masonry drill bit
- Mixing paddle
- Ladder
- Mason’s trowel
- ¼-inch tuck pointer
- Jointer
- Brush
- Water sprayer
- One-inch chisel
- Shop vacuum and extension cord
Step 1
Set up your ladder. Assuming you can reach the bricks you’re replacing – and you don’t need another ladder or anything else – let’s begin here. Use your drill and 5/8-inch masonry drill bit to drill two holes for the bricks in the middle of the wall, three holes for the bricks on the corners.
Use your one-inch chisel or hammer setting on your hammer drill to start crushing the brick. A tip for replacing spalling bricks is to begin above or below the holes. Removing the brick ought to be fairly easy. The leftover mortar on the other bricks is going to be a little more difficult.
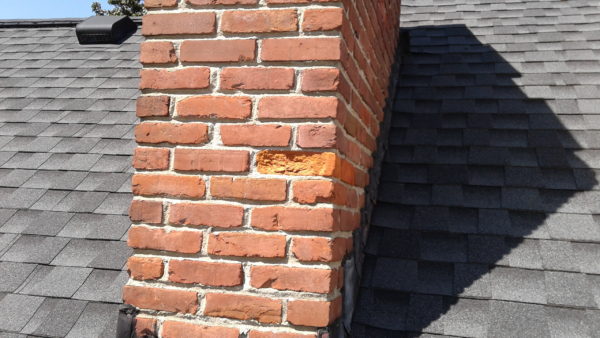
The spalled chimney brick is in need of repair.
Step 2
Use your one-inch chisel to tap on the leftover mortar on the other bricks. If the chisel doesn’t work that well, use a line pin. Try to tap between the brick and old mortar. If that still doesn’t work, sand the mortar out using sandpaper. Dry-fit the brick.
Step 3
Use your cordless drill or a small square trowel to mix up your pre-mixed mortar in a five-gallon bucket. Remember a little water goes a long way, so assure your mortar is kind of dry. Now stick your trowel, jointer, soft brush, and tuck pointers in the bucket. You’re ready to lay brick.
Step 4
Use your water sprayer to mist the hole where you’re putting the brick. This allows for a good bond. Butter your brick, and then butter the hole the brick is going into. Slide the brick into the hole. Look at the bricks to the right and left. Is it close to being in the middle of those bricks on either side? Good, those are your head joints.
How about the bricks on the bottom? Is it parallel with those bricks? Great, that’s your bed joint. Now, use your tuck pointer to tuck point the top joint and pack the mortar all around the brick. Is the mortar thumbprint hard yet? Then let’s joint it, brush it, and joint it again.
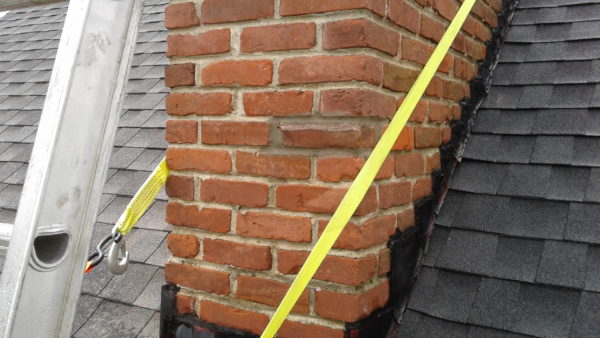
Shown is the finished, repaired chimney brick.
Step 5
Time to clean up your area. Use your brush and trowel to sweep up the loose bricks and old mortar. Put everything in your bucket. Take the bucket down, and then bring up your shop vac and vacuum up the remaining dust. If you can get a hose up there, hose the roof down after you’re done.
You’re finished replacing spalled bricks on a chimney. Wait a couple days, and then come back with some waterproofing sealer, a paint brush and a paint roller to waterproof the chimney.
Brian Estill is a brick mason and masonry artisan in Louisville, Ky.
